A pneumatic circuit can have premium valves, precision regulators, and correctly sized actuators, then still underperform because of one bad tubing install. A crushed outside diameter, an angled cut, or a missed bend radius is enough to create chronic leaks, pressure drop, sluggish motion, or intermittent faults that waste hours on the floor. If you need to know how to install pneumatic tubing for reliable industrial service, the job starts long before the tube is pushed into a fitting.
In most plants, tubing installation problems do not show up as dramatic failures on day one. They show up as nuisance alarms, inconsistent cylinder speed, vacuum loss, or fittings that start weeping after vibration and temperature cycling. That is why good installation practice is not cosmetic. It is part of system performance.
How to install pneumatic tubing with fewer failures
The cleanest installation is usually the one that looks almost boring. The tubing run is sized correctly, cut square, supported where it should be, and routed away from abrasion, radiant heat, and moving pinch points. There is enough slack for service and motion, but not so much that the tube whips or rubs.
Before you install anything, confirm the tubing material matches the application. Polyurethane is often chosen for flexibility and tight routing. Nylon is common where higher pressure resistance and stiffness help. Polyethylene can work well in specific lower-flex applications. In demanding environments, the wrong material creates avoidable trouble even when the fitting connection is perfect. Oil mist, washdown chemicals, UV exposure, ambient heat, and repeated flexing all affect tubing life.
Sizing matters just as much. Engineers usually focus on fitting thread size and overlook internal tube diameter. If the ID is too small, you can create unnecessary flow restriction, slower actuator response, and unstable timing. If the OD does not match the fitting specification exactly, the connection may seem installed but will not seal consistently. In pneumatic systems, close enough is not a real specification.
Start with the route, not the fitting
A common installation mistake is building the run one connection at a time without planning the path. That usually leads to sharp bends near fittings, extra length stuffed into a panel, or tubing crossing components that need future service access.
Lay out the route first. Check for hot surfaces, edges, vibration sources, and doors or guards that may compress the tube during operation. If the tubing runs to moving equipment, account for full travel and repeated motion. Tubing that looks fine with the machine at home position may pull tight or kink under extension.
In compact automation assemblies, routing trade-offs are real. The shortest run is not always the most reliable run. A slightly longer path with a wider bend radius and proper support often outperforms a short run forced through a tight corner.
Preparing tubing for installation
Good prep eliminates most connection issues. Use a sharp tubing cutter designed for pneumatic tube, not side cutters, a utility knife, or anything that flattens the profile. The cut must be square and clean. If the end is angled, burred, or slightly oval, the tube may not seat fully against the fitting stop.
After cutting, inspect the end. Look for scoring, deformation, or contamination. If debris gets into the line during installation, it can move downstream into valves, flow controls, and cylinders. That is especially risky in small-bore or precision control circuits.
If the tubing has been stored on a coil, let it relax before installation when possible. Fighting coil memory can pull the tube sideways inside the fitting or create side load on the connection. On static runs, this side load may not fail immediately, but over time it can reduce sealing reliability.
Inserting tube into push-to-connect fittings
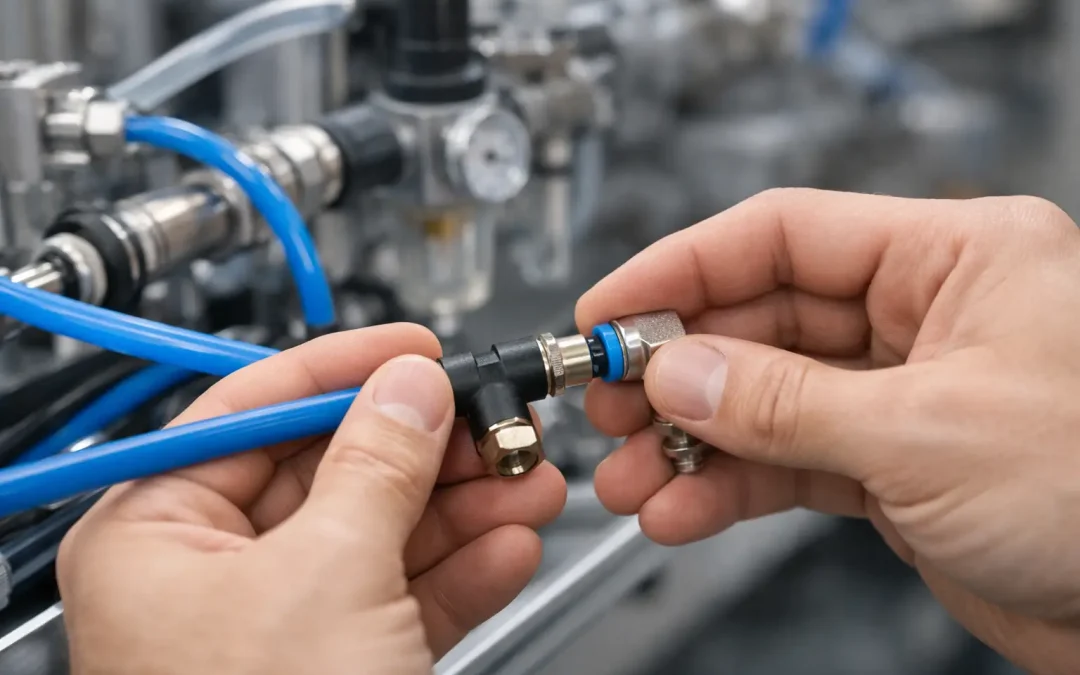
For most industrial pneumatic assemblies, push-to-connect fittings make installation fast and repeatable, but only when the tube is inserted correctly. Push the tube straight into the fitting until it bottoms out on the internal stop. Do not force it in at an angle. If you feel partial engagement and stop early, the collet may grip the tube while the seal is not fully made.
After insertion, perform a gentle pull test. The tube should remain captured without backing out. If it shifts significantly, remove it, inspect the end, and reinstall with a fresh square cut if needed. This small check saves a lot of leak chasing later.
If you need to remove and reinstall tubing repeatedly during assembly or maintenance, inspect the tube end every time. Collet teeth can mark the OD. Light witness marks are normal, but deep scoring or deformation means cut back to fresh material before reinstalling.
Bending, supporting, and protecting the run
Most tubing failures in the field are mechanical, not pneumatic. The tube gets bent too tightly, dragged over an edge, or left unsupported near a vibrating manifold. A leak at the fitting is often the final symptom, not the root cause.
Respect the minimum bend radius for the tubing material and size. Tight bends reduce flow area and can create stress whitening, especially in stiffer materials. Near a fitting, leave enough straight length before the bend so the connection is not side loaded. This is one of the most overlooked details in cabinet builds and machine retrofits.
Use clamps or supports where vibration, movement, or long spans make the tube unstable. Support spacing depends on tube size, material stiffness, and machine dynamics, so there is no single rule for every build. In high-vibration equipment, more support is usually better than less, provided the clamps do not crush the tubing.
Where abrasion is possible, add protection or reroute the line. A tube rubbing lightly against a bracket may survive for weeks, then fail during a peak production run. Heat deserves the same attention. Even if the pressure rating is acceptable, elevated ambient temperature can shorten tubing life and affect flexibility.
Watch the dynamic sections
Dynamic runs deserve separate scrutiny. If the tube feeds a moving actuator carriage, robot end effector, or hinged guard assembly, avoid repetitive torsion and sharp flex points. Repeated bending at the same exact spot will eventually fatigue the tube. A controlled loop with enough length to distribute movement is usually more durable than a tight direct path.
Vacuum lines can be even less forgiving in dynamic service. A bend that does not leak under pressure may still collapse enough under vacuum to reduce grip performance or response. In those applications, routing and wall strength matter as much as connection quality.
Pressure testing after installation
Once the tubing is installed, bring the system up in a controlled way. Pressurize gradually and verify the expected operating pressure before declaring the job complete. A line that survives a quick air-up is not automatically installed correctly.
Listen for leaks, but do not rely on sound alone in a noisy plant. Use an approved leak-check method around fittings and suspect areas. Watch actuator response too. Sluggish extension, overspeed return, or inconsistent cycle timing can point to restriction, incorrect routing, or a partial seal issue.
It also helps to observe the tubing while the machine is operating, not just while static. Movement can reveal problems you will not see at rest, including tube pull at full stroke, rubbing during carriage travel, or vibration that causes fitting movement.
Common installation errors that cause callbacks
Most callbacks come from a short list of preventable mistakes. The first is using the wrong tube OD for the fitting. The second is a poor cut. The third is routing that ignores motion, heat, or abrasion. After that, problems usually come from over-tight packaging inside panels and from mixing tubing materials without considering performance differences.
Another frequent issue is assuming all pneumatic circuits tolerate the same install quality. They do not. A simple utility air line has more forgiveness than a high-cycle pick-and-place machine, a vacuum handling circuit, or a tightly timed actuator sequence. As system performance demands increase, tubing installation quality becomes more critical.
When troubleshooting repeat leaks, do not focus only on the fitting. Check whether the tube is being pulled sideways, bent too close to the connection, or damaged from prior removal. Replacing the fitting without correcting the mechanical cause usually buys very little uptime.
For manufacturers and maintenance teams working under tight schedules, the best practice is standardization. Use the correct cutter, verify material and size before assembly, route with service access in mind, and inspect every connection with the same discipline. That approach is faster than rework, and it protects the performance of every valve, regulator, and actuator downstream.
If you are specifying or replacing tubing in a demanding application, choose components that match the pressure, environment, and movement profile of the machine. A clean install is not just about looking organized. It is about building air circuits that hold pressure, respond correctly, and stay in service when production cannot wait.